How to Create a New User
Create Three Types Of Users.
Note : – If you make a user for the first time then it is necessary to create a billing plan
There are mainly two ways to create a new user
-
- One By One Create new user.
- Import multiple users together.
One By One Create New User
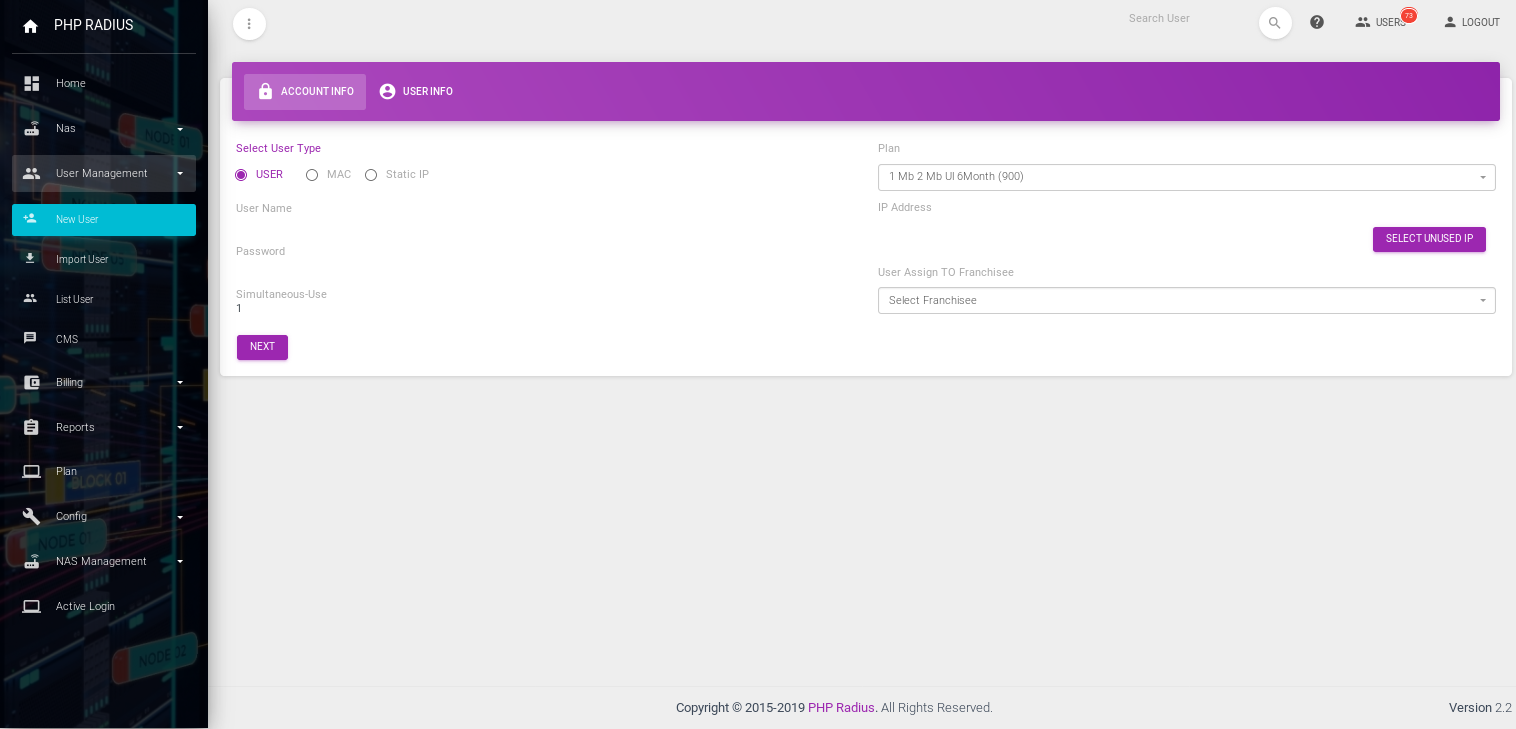
- Go to sidebar and click on User Management > New User Option
- After click on New User option, you can see there has two tab on open page
- User Account Information
- customer Information
User Account Information
- Here , you will see the option, “select user type”
- you can select a type of user, which you want to make
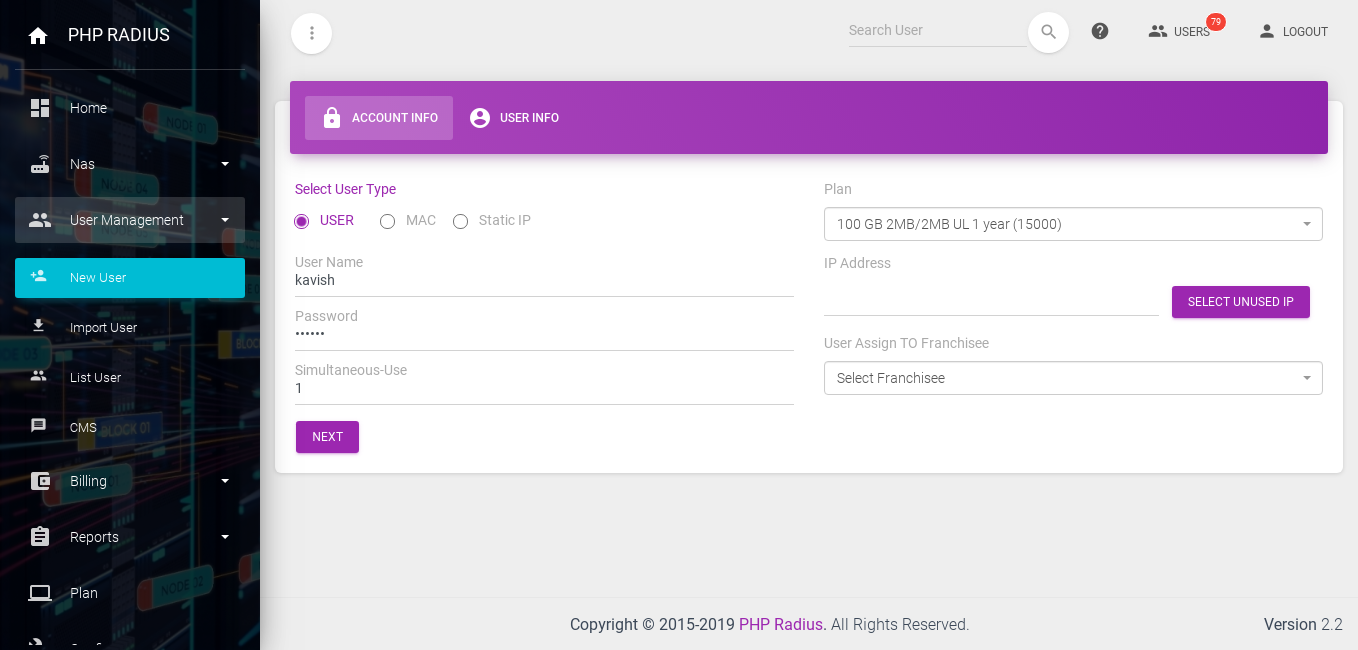
1. Simple user
- If you want to make simple user,then select simple user.
- After selecting a Simple user , Insert Unique Username and Password.
- You will see an option “simultaneous -use ” .
- insert simultaneous use for one or more connection.
- if you insert more then one simultaneous use does not insert the IP address.
- when you insert more than one simultaneous then an option ” IP Address” will automatically disappear.
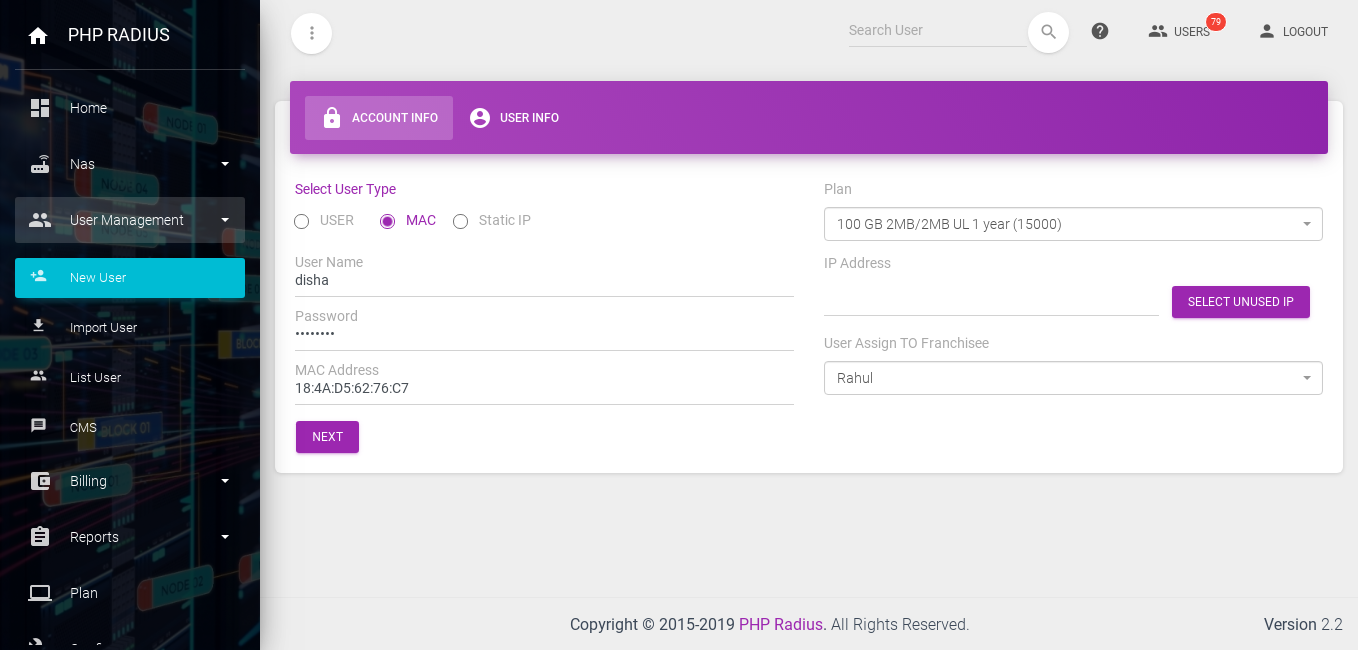
2. Mac User
- To create Mac User , select Mac user option.
- After selecting a Mac user, Insert Unique Username and Password.
- Insert MAC address of the user.
- Then you have to give the plan to the user based on the requirement.
- insert an IP Address of user.
- If you want to assign user to franchisee then select on “user assign TO franchisee”.
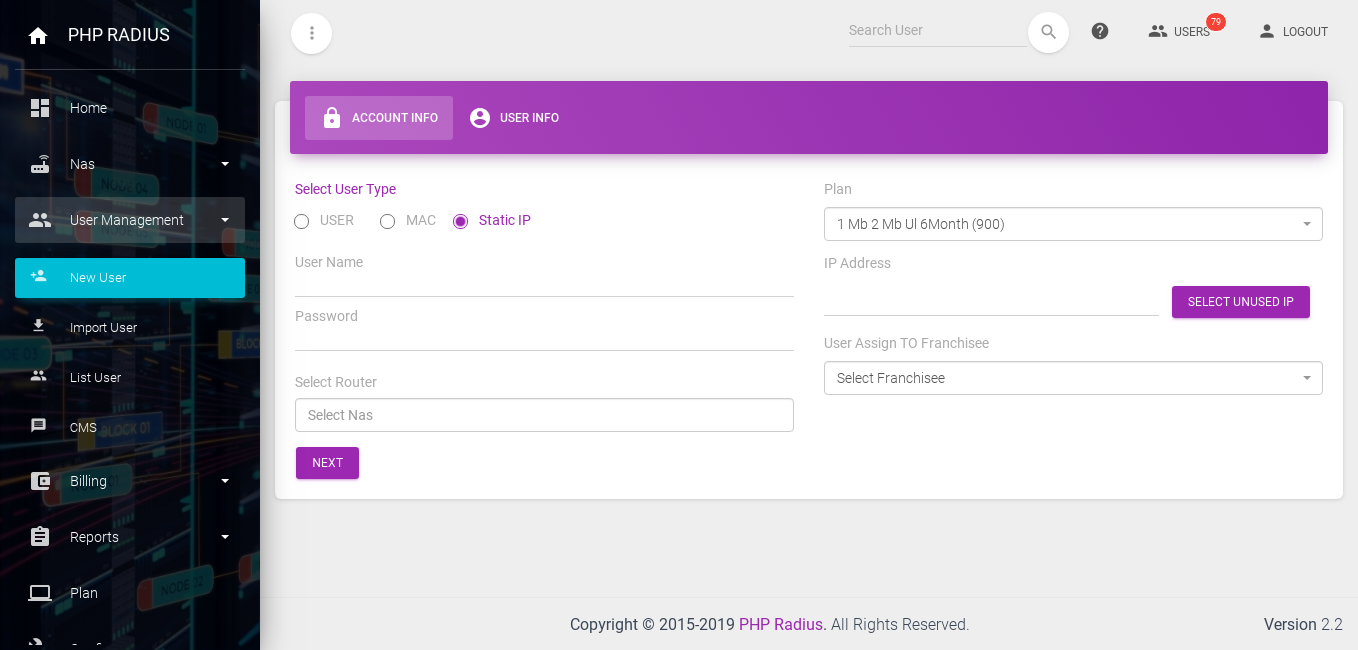
3. Static Ip User
- If you create Static IP user select router for user authentication on specific NAS
- Now select plan for user starts your ISP service.
- Insert IP address if simultaneous use only one or create a static IP user or create a MAC user.
- Click next button go to the second tab user information
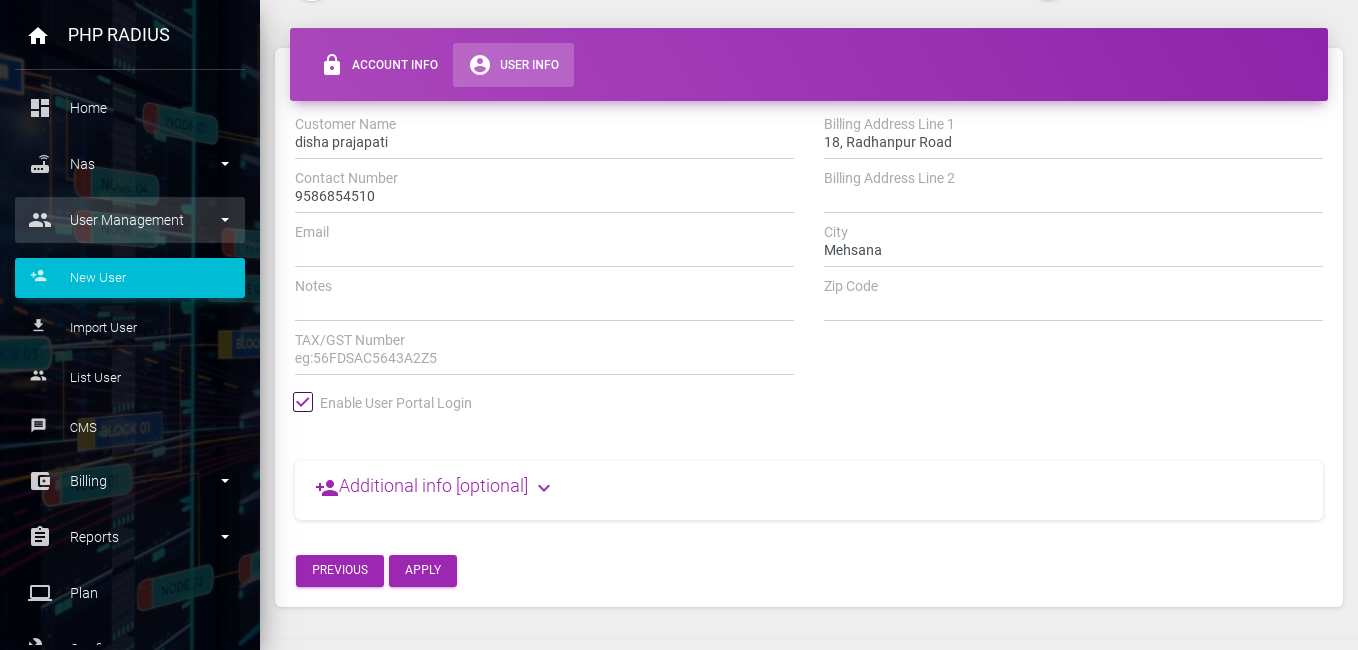
User Information
- This tab getting user information like user full name, user contact number, email address, permanent billing address, city, zip code, user TAX number.
- If you want to fill-up extra information like CAF(Customer Application Form) then click Additional info tab.
Note : – in Additional info all details are optional.
- do you want to the customer access on the client portal then click on Enable user portal login otherwise not.
Import Multiple New User
- If you want to import multiple user then,
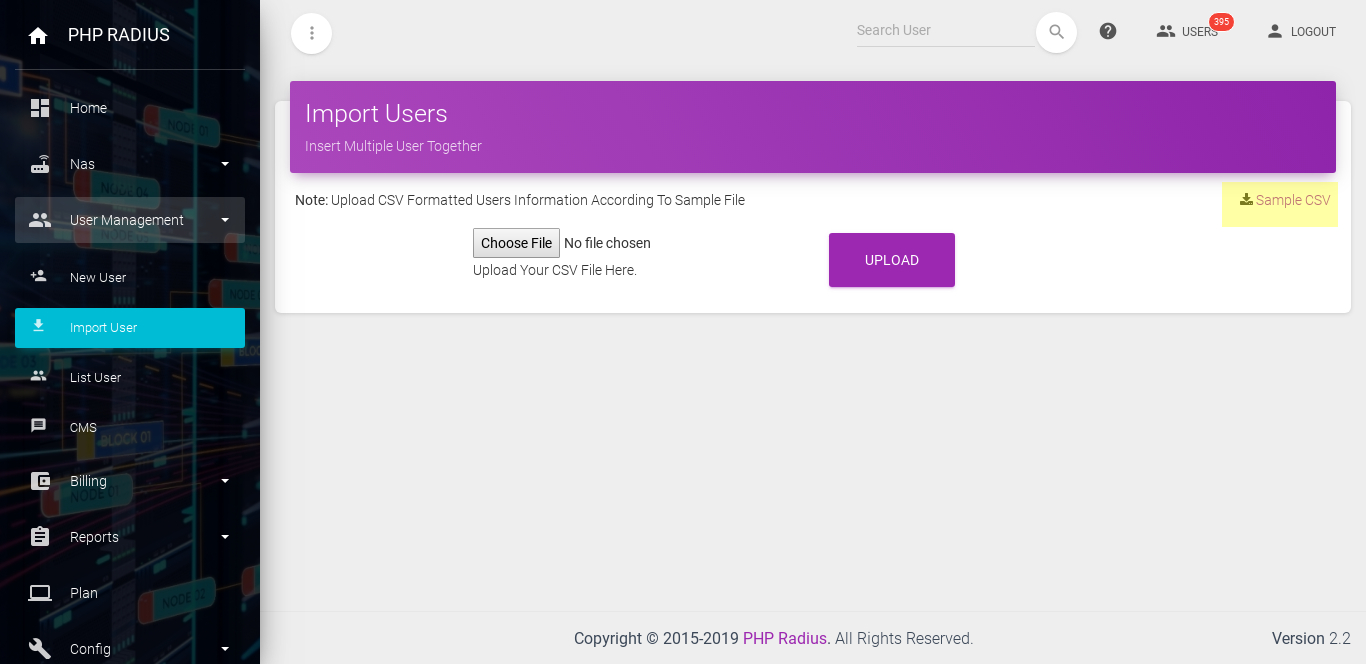
- Go to the sidebar and click User Management > Import User option.
- Choose the file you want to create .CSV Format from your pc.
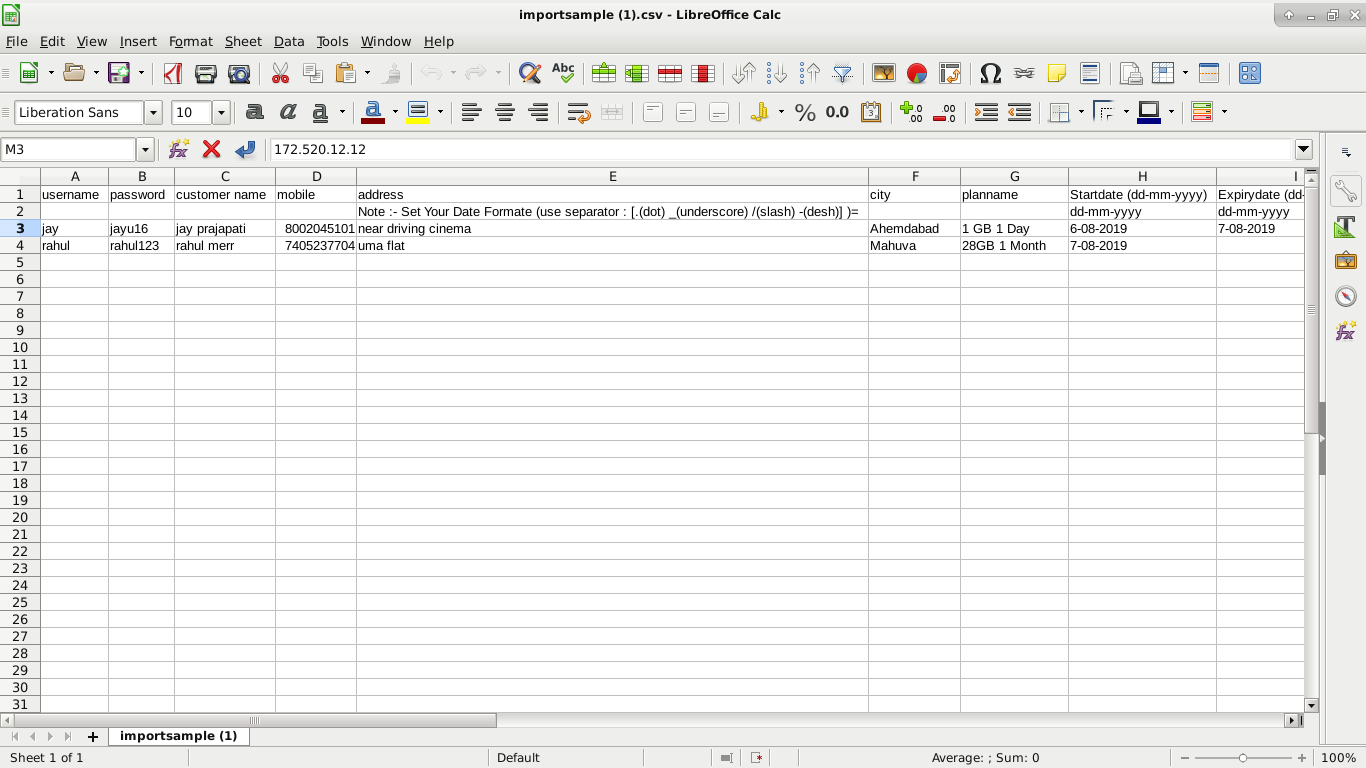
- if you don’t know about .CSV format then download a sample file from top right corner on the card of an open window.
- In The first and second row don’t change any content you can insert user information on the third row.
- second-row start date and expiry date column if you change date format then change the create format using separator : [ .(dot), _(underscore), /(slash), -(dash)].
- you can’t enter new billing plan name enter only old plan name
- save this file as .CSV
- now click on Upload button.
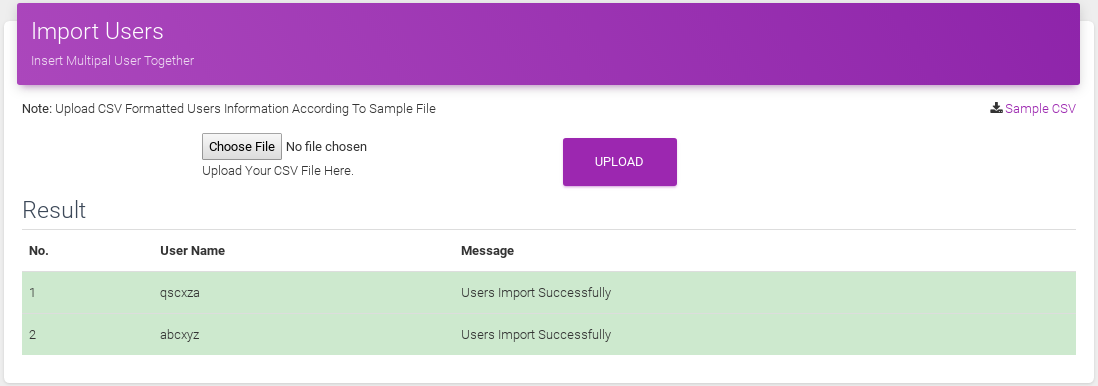
- If your file upload successfully then you will see all username and message.
- user add successfully then all data row display in green color otherwise it will display in red color.
