How to Create a New Billing Plan
- PHP Radius provides the facility to create different recharge plans via new billing plan from plan menu.
- There are two ways to Create New Billing Plans :
- One By One Create Plans
- Multiple Plans imports Together
Here, Five types of plans you can create.
1. One By One Create a New Billing Plan
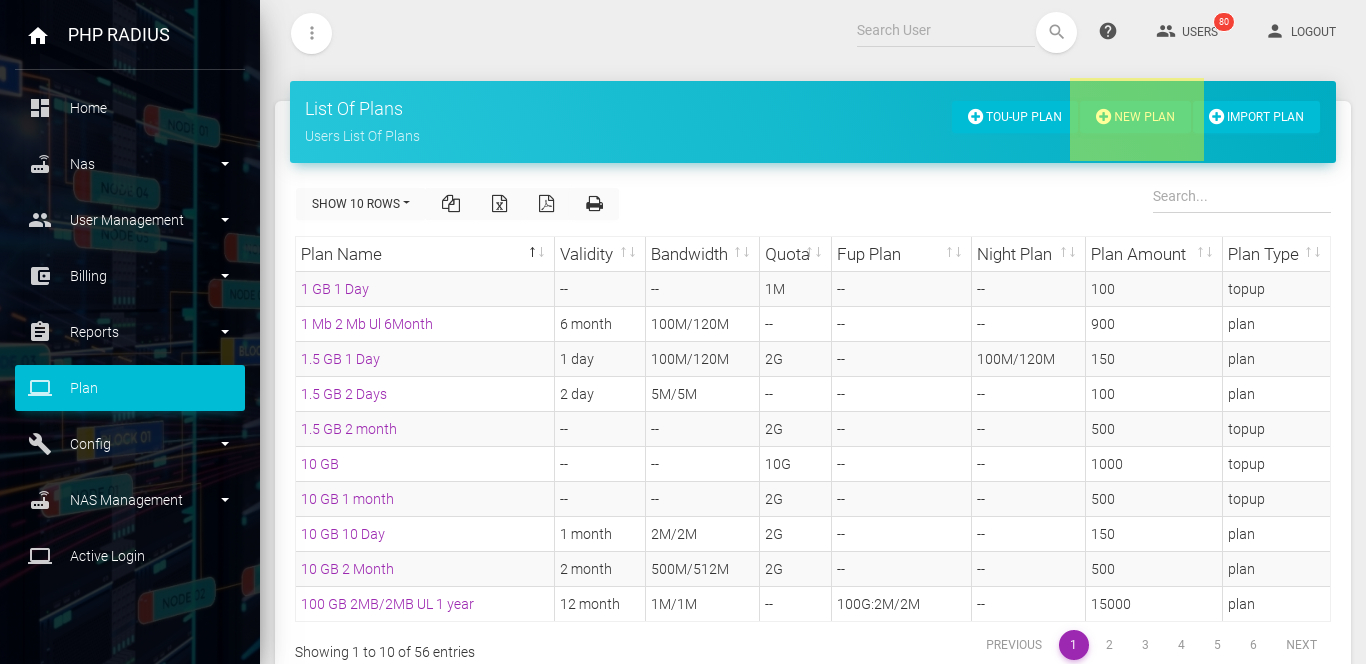
- To create a new plan, go to the sidebar select New plan from the Plan menu.
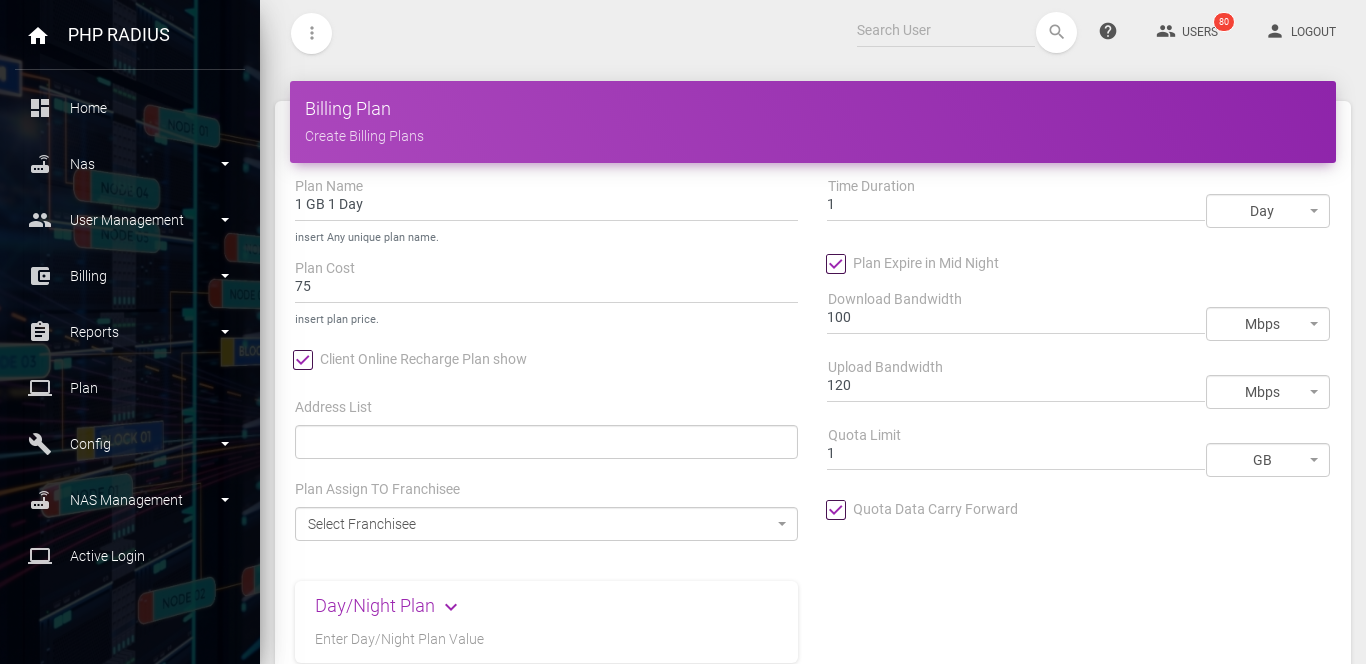
- It will open new plans creation page, fill all the details as on your plans type.
- To create a new billing plan, provide details like type, name, cost, daily data limit, assign to the franchisee, Time duration, download bandwidth, upload bandwidth, and plan Quota limit.
- The plan type may be prepaid or postpaid.
- Plan name means you give any name to plan.
- Plan cost means the amount to be paid by the customer for this plan.
- The client recharge online only those plans which are allowed by ISP.
- Enter the address list[it is optional] if you bind a multiple user address list for these plans.
- Set a plan daily data limit then tick on the checkbox( Set plan daily data limit).
- Assign to the franchisee means to assign a plan to the selected franchisee.
- Plan Expires in Mid Night means the plan expired at midnight of expired date.
- Time duration means a set time limit for the plan in a minute, hour, day, month, year.
- To set download and upload bandwidth in KBPS or MBPS.
- The quota limit of any plan can be in MB, GB, and TB.
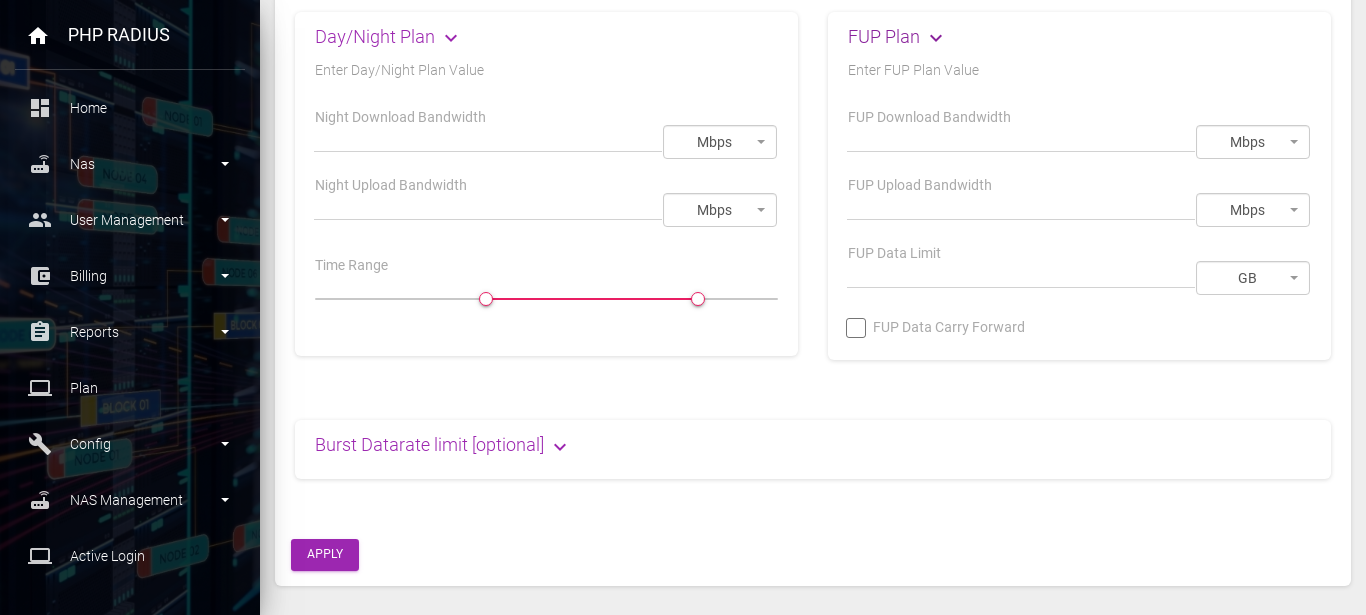
- The day-night plan applies only on an unlimited and Quota based plan.
- when you create day/night plans at that time you can not create FUP Plans.
- when you create FUP Plans at that time you can not create Day-night or Quota plans.
- if you want to create day/night plans then fill all the day/night plans details.
- Creating day/night plans Read More…..
- if you want to create Fup plans then fill all the FUP plans details.
- Creating fup plans Read More…..
- Setting Burst Datarate limit is optional if you want to set Burst Datarate limit fill all the data, then click on apply button.
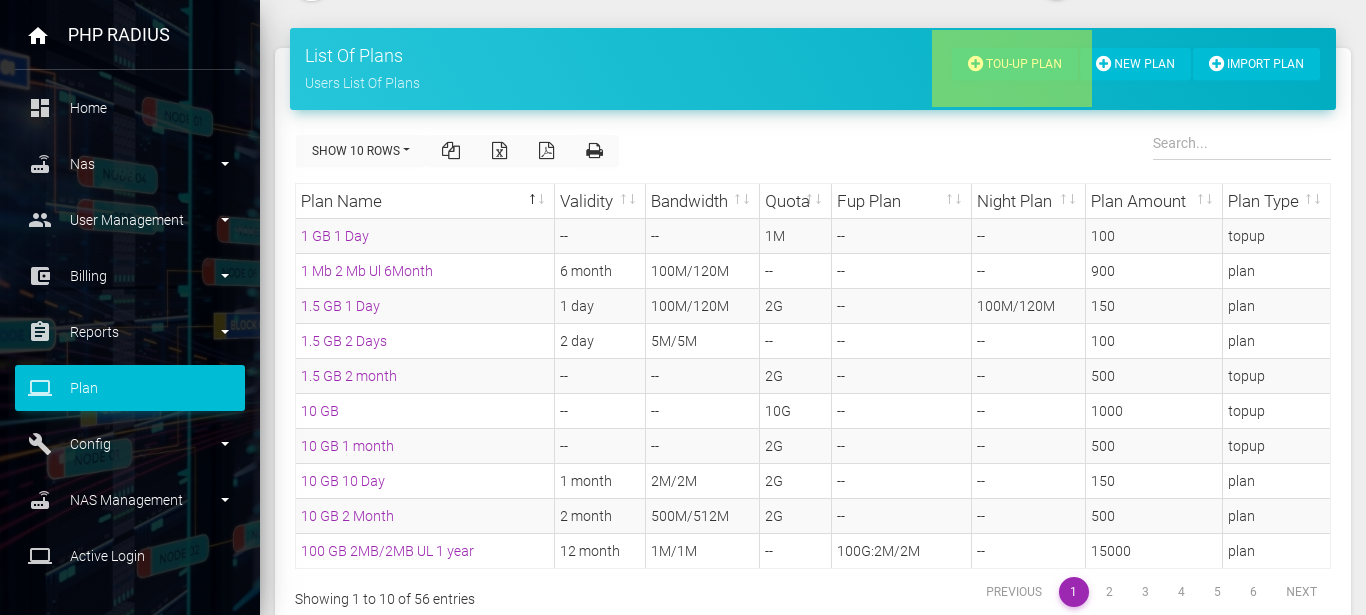
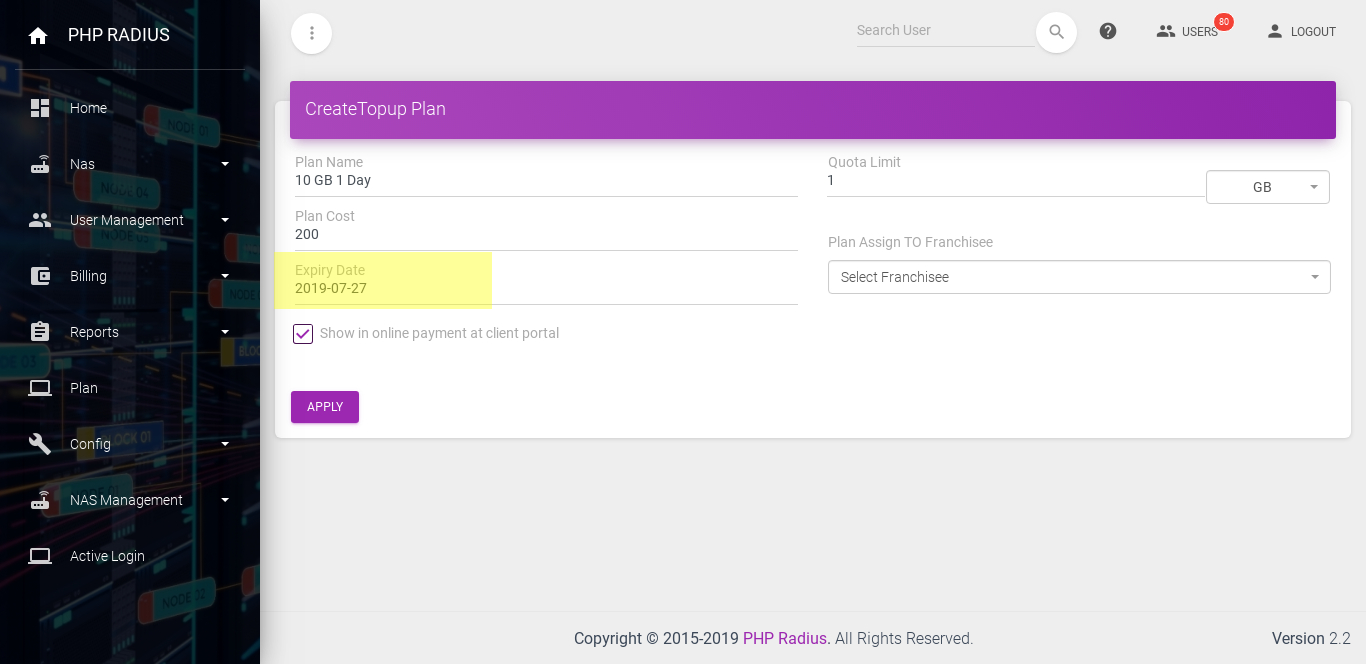
- To create a new top-up plan, go to the sidebar select top-up plan from the Plan menu.
- It will open the new plans creation page, fill all the details like plan name, plan cost, Expiry date, Quota limit, and plan assign to the franchisee.
- Plan name means you give any name to plan.
- Plan cost means the amount to be paid by the customer for this plan.
- Assign to the franchisee means to assign a plan to the selected franchisee.
- The client recharges online only those plans which are allowed by ISP.
- if you want to create a simple top-up plan at that time do not enter an expiry date, but you create a bonus top-up plan at that time must enter an expiry date.
2. Import Multiple New Billing Plan
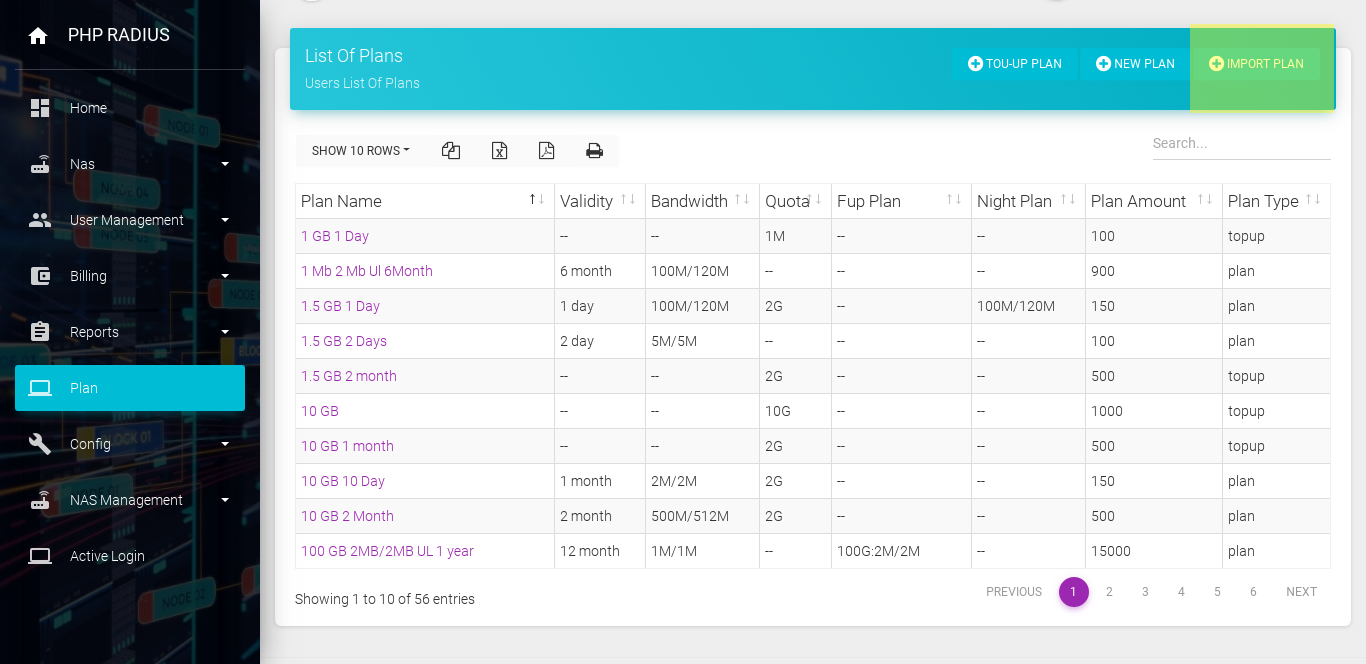
- To Import multiple plans, go to the sidebar and click on the import Plan option from the plan menu.
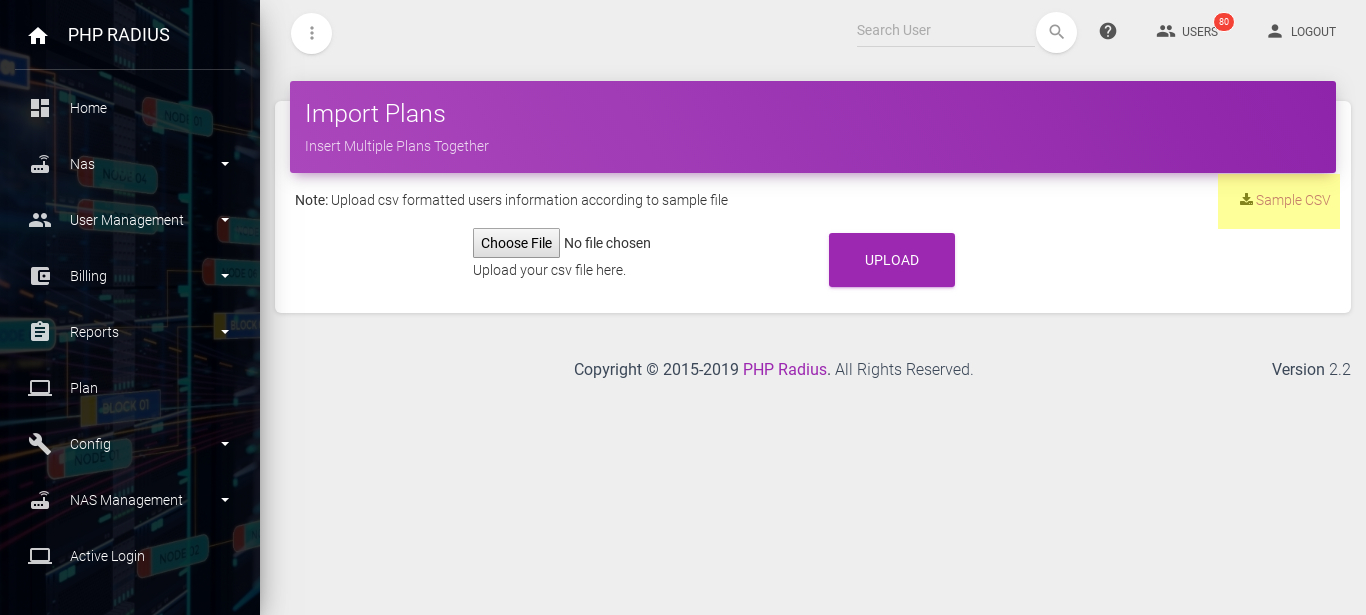
- It will open import plan page then choose .csv file and click on upload button for importing multiple plans from this file.
- Click on Sample.CSV and download the Sample.CSV file when you don’t know about the CSV file format.
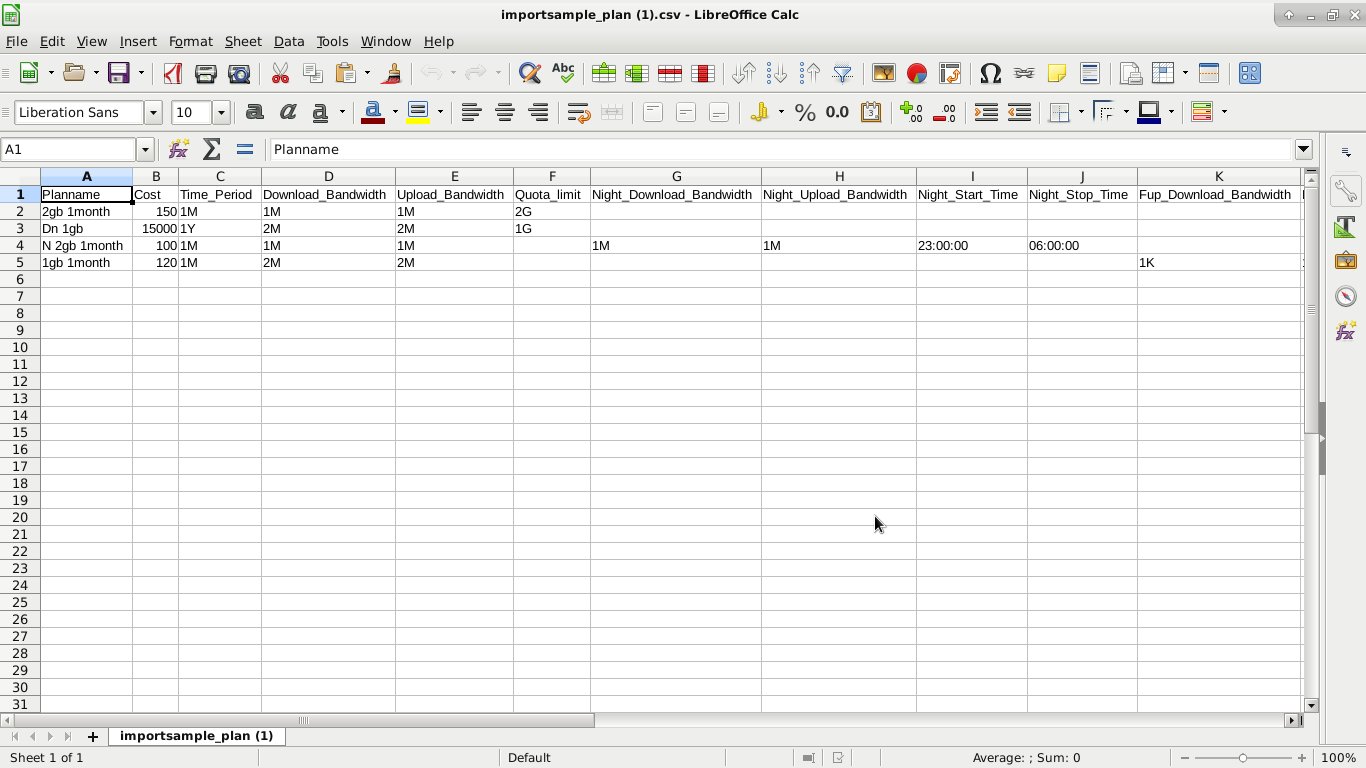
- After successfully downloading the Sample.CSV file you can see the format of this file.
- The formate of the CVS file contains Plans name, Cost, Time_Period, Download_Bandwidth, etc.
- When you change the CSV file formate then plans are not imported successfully.
- enter Plans Name which must be unique, cost, Time_Period such as Month’s M, Year’s Y, Day’s D(EX: 1D, 1Y, 1M).
- now insert Download_Bandwidth and Upload_Bandwidth in Mbps’s M, Kbps’s K (EX: 120M, 100K).
- if you want to create quota plans then enter Quota_limit in MB’s M, GB’s G, TB’s T like 1M, 2T, 1G.
-
whenever you create day/night plans then enter Planname, Cost, Download_Bandwidth, Upload_Bandwidth, Night_Upload_Bandwidth, Night_Download_Bandwidth, Night_Start_Time and Night_Stop_Time not all data.
- for create FUP plans then only enter Planname, Cost, Download_Bandwidth, Upload_Bandwidth, Fup_Upload_Bandwidth, Fup_Download_Bandwidth and Fup_Quota_limit not all information.
- when you cerate fup plans do not enter Quota_limit.
- after fill all data then save the file.
- Click on the Choose File button and select the CSV file and click on Upload Button.
- Now you can see plans are inserted successfully or not.
